
Using BrowserScan with Chameleon Mode: Step-by-Step Guide
How to Use BrowserScan with Chameleon Mode
Running multiple online accounts without getting flagged or banned demands a bulletproof privacy stack. Two tools that experts rely on are BrowserScan (a comprehensive privacy and leak-testing suite) and Chameleon Mode (an antidetect browser that uses real, vendor-signed browsers instead of modified Chromium forks). In this guide, you’ll learn exactly how to pair them—using BrowserScan to verify that every Chameleon Mode profile is truly isolated, leak-free, and ready for high-stakes multi-account operations.
What Is BrowserScan?
Using BrowserScan with Chameleon Mode: Step-by-Step Guide product interface and feature overview.
BrowserScan is an all-in-one online privacy checker. It performs browser fingerprint analysis, DNS leak tests, WebRTC leak tests, IP lookups with geolocation and blacklist checks, port scanning (backed by nmap), internet speed tests, and user agent parsing—all without requiring any plugins or extensions. Privacy-conscious users, VPN testers, and security researchers use BrowserScan to confirm that their network and browser configurations aren’t leaking identifiable data.
Key capabilities:
- Browser fingerprinting detection with an authenticity score that tells you how unique (and trackable) your fingerprint is.
- DNS, WebRTC, and IP leak testing to ensure your real location stays hidden.
- IP lookup pulling from multiple sources (ip-api, IPinfo, IP2Location, db-ip, IPQuery) to cross-check geolocation and blacklist status.
- Port scanner and other network diagnostics.
What Is Chameleon Mode?

Using BrowserScan with Chameleon Mode: Step-by-Step Guide product interface and feature overview.
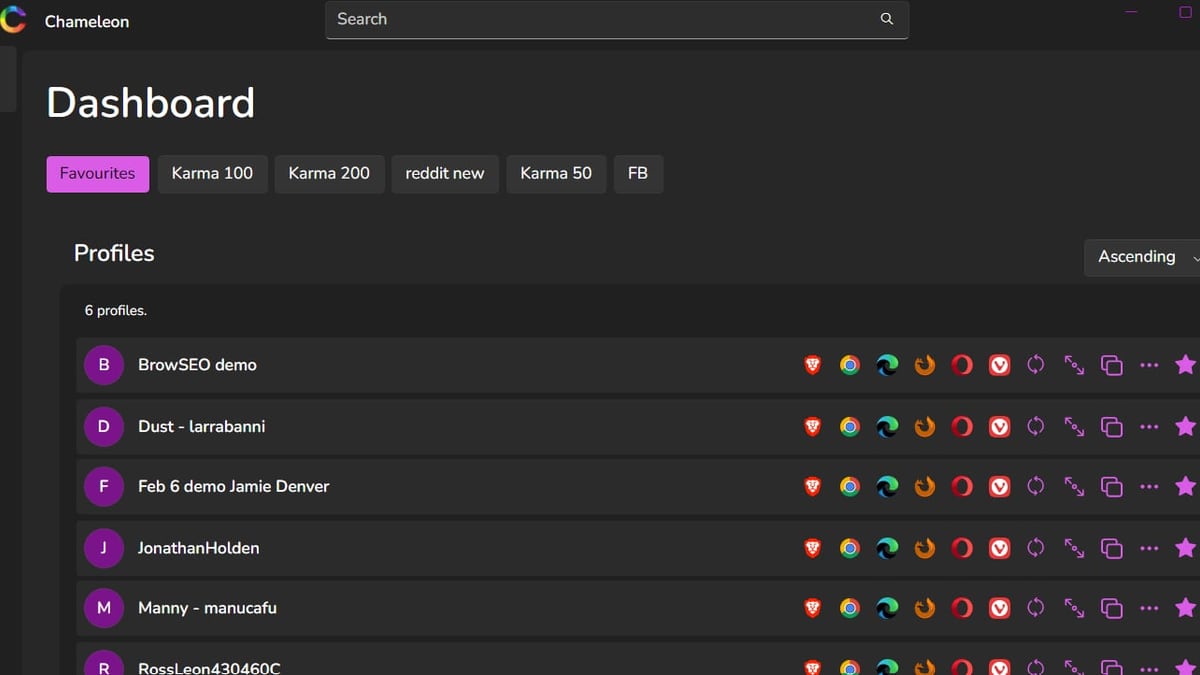
Chameleon Mode is a desktop antidetect browser for Windows, macOS, and Linux. Its core philosophy is opposite to most antidetect tools: instead of patching a Chromium fork to spoof browser attributes, it manages the real, unmodified browsers you already have installed—Chrome, Firefox, Firefox, Edge, or Brave. Each profile runs in a fully isolated environment with its own cookies, cache, network state, timezone, locale, and viewport settings. Because the browser binary is vendor-signed and auto-updates normally, the TLS fingerprint matches that of a legitimate user every time.
Why this matters:
- No TLS fingerprint drift—modified browsers often fail at the transport layer before JavaScript even runs.
- Full profile isolation prevents cross-account contamination.
- Auto‑sync aligns timezone, geolocation, and locale with the proxy you assign.
- Playwright automation built‑in for scaling operations.
Why Combine BrowserScan and Chameleon Mode?
Using BrowserScan with Chameleon Mode: Step-by-Step Guide product interface and feature overview.
A Chameleon Mode profile is only as strong as its configuration. A misconfigured proxy, an overlooked WebRTC setting, or a timezone mismatch can expose your real identity and link accounts together. BrowserScan acts as a verification layer: after you build a profile in Chameleon Mode, you run a battery of real‑time tests inside that isolated environment to confirm that no leaks exist and that the fingerprint is clean. This workflow gives you confidence before you ever log into a sensitive account.
What you can catch:
- DNS leaks that reveal your ISP.
- WebRTC leaks that expose your local IP even through a proxy.
- IP‑geolocation mismatches that look suspicious to anti‑fraud systems.
- Fingerprint anomalies—like canvas or font inconsistencies—that suggest a spoofed browser.
- Blacklisted IPs that can get accounts locked instantly.
Step-by-Step: Using BrowserScan with Chameleon Mode
Using BrowserScan with Chameleon Mode: Step-by-Step Guide product interface and feature overview.
Here’s exactly how to run a full privacy audit on a Chameleon Mode profile using BrowserScan.
1. Install & Set Up Chameleon Mode
Download Chameleon Mode from the official site and install it on your operating system. During setup you’ll create your first browser profile.
- Choose a browser: Chrome, Firefox, or Brave (always use the stock, vendor‑signed version).
- Set resolution, timezone, and locale. Alternatively, let auto‑sync pull these from your proxy later.
- Leave fingerprint generation on automatic; Chameleon Mode will handle canvas, WebGL, audio, and font spoofing natively without modifying the browser binary.
2. Configure a Proxy and Activate Auto‑Sync
Within the Chameleon profile, assign a reliable proxy (SOCKS5, HTTP, or HTTPS). It can be a datacenter, residential, or mobile proxy. Then turn on Auto Environment Sync to align timezone, geolocation, and locale with that proxy’s IP. This eliminates the common mistake of having a UK proxy but a US timezone.
3. Launch the Profile and Open BrowserScan
Start the profile from the Chameleon dashboard. You’re now inside the isolated environment. In that browser, navigate to https://www.browserscan.net/. No plugin or installation is needed—BrowserScan runs entirely from the web page.
4. Run a Browser Fingerprint Test
Click on the fingerprint test (usually the default homepage scan). BrowserScan will analyze:
- User agent
- Canvas hash
- WebGL renderer
- Fonts, plugins, and screen details
- Audio context and hardware concurrency
Look at the Authenticity Score. A score above 90% means the fingerprint appears naturally occurring, not artificially spoofed. Thanks to Chameleon Mode’s approach of using a real browser binary with native TLS, you should see a high authenticity score—often in the 95%+ range. If the score is low, double‑check that you’re using a stock browser (not a patched fork) and that fingerprint settings aren’t overly randomized.
5. Run a DNS Leak Test
Select the DNS leak test from BrowserScan’s menu. The tool queries multiple DNS servers and reports which ones answer and from what IP addresses. All DNS queries should resolve from your proxy’s location, not from your ISP. If you see your real ISP’s IP, your proxy or network configuration is leaking DNS. In that case, re‑verify the proxy settings in Chameleon Mode and consider using a proxy that enforces DNS over the tunnel.
6. Check for WebRTC Leaks
WebRTC can expose your real local IP even when you’re behind a proxy—a classic privacy vulnerability. BrowserScan’s WebRTC leak test uses multiple STUN servers to try to discover your internal and external IPs. If the test succeeds, you’ll see a local IP (like 192.168.x.x). With Chameleon Mode, WebRTC is controlled per profile. If you still see a leak, go back to the profile settings and disable or restrict WebRTC, or use a proxy that mutes WebRTC responses.
7. IP Lookup & Geolocation Check
Use the IP lookup tool to verify that your public IP matches the proxy’s expected location. BrowserScan pulls data from five different geolocation databases, so you can see if any source disagrees. Moreover, it checks blacklist status (DNSBL, Spamhaus, etc.). An IP that appears in multiple blacklists could cause immediate account flags on platforms like Google or Facebook.
8. Optional: Port Scan and Advanced Tests
BrowserScan’s port scanner (powered by nmap) can probe common ports on your visible IP. While less critical for account integrity, it helps confirm that your proxy or VPN isn’t exposing unnecessary services. The internet speed test is also handy if you’re using the profile for automation and need to know if latency is acceptable.
9. Document the Results
For each profile, consider taking a screenshot of the BrowserScan dashboard showing the authenticity score, DNS test, and IP geolocation. If you’re managing dozens of identities for clients or campaigns, this documentation helps with troubleshooting and demonstrates due diligence to your team.
Interpreting Results and Troubleshooting
| Issue | Likely Cause | Fix |
|---|---|---|
| Low fingerprint authenticity score | Canvas/font randomization too aggressive or non‑stock browser | Use the real, vendor‑signed browser; reduce noise in fingerprint settings |
| DNS leak reveals real ISP IP | Proxy not handling DNS, or DNS forced locally | Use a proxy that provides DNS resolution; enable DNS leak protection in Chameleon Mode |
| WebRTC leak shows local IP | WebRTC not disabled or muted in the profile | Disable WebRTC in the profile or configure proxy to block WebRTC |
| IP geolocation mismatch | Proxy geo different from timezone/locale sync | Turn on Auto Environment Sync; manually align timezone if needed |
| Blacklisted IP | Proxy IP previously flagged by anti‑abuse databases | Switch to a different proxy endpoint or use residential IPs |
After any configuration change, re‑run the BrowserScan tests inside the same profile to confirm the fix.
Practical Example: Verifying an Affiliate Marketing Profile
Suppose you’re an affiliate marketer running Facebook ad accounts across multiple geos. You’ve set up a Chameleon Mode profile for a UK‑based account with a UK residential proxy and the following parameters:
- Browser: Chrome (latest stable)
- Resolution: 1920×1080
- Timezone: Europe/London
- Locale: en‑GB
Before buying ads, you open the profile and navigate to BrowserScan. The fingerprint authenticity score reads 97%. The DNS test shows all queries answered by the proxy IP in Manchester. The WebRTC test returns no local IP. The IP lookup confirms Manchester geolocation across all five databases, and no blacklists are triggered. You now know this profile is ready to operate without raising red flags. If later you scale to 50 profiles, you can quickly spot‑check a fraction of them with BrowserScan to maintain quality.
For even deeper privacy audits, you might combine BrowserScan with an IP intelligence API, as detailed in our guide on how to use BrowserScan with Abstract API for privacy audits. That workflow enriches IP data with email and phone verification, further reducing account risk.
Related reading
- Akamai Cloud Review: Pricing, Performance, and Honest Verdict - Read our in-depth Akamai Cloud review covering pricing, GPU instances, global data centers, ideal use cases, and how it compares to hyperscalers—no egress bill surprises.
- Top 10 Internet Speed Test Tools 2026 (Latency, Jitter & Accuracy) - We ranked 10 best internet speed test tools in 2026 for accuracy, bufferbloat detection, latency, and ease of use. See how Ookla, Fast.com, Cloudflare compare.
Sources and further reading
- Chameleon Mode: Is it the Right Antidetect Browser for You? - Lean about Chameleon Mode, an antidetect browser built for scale, reliability, and workflow. Manage accounts, rotate proxies, and stay undetected.
- Defeating Persistent Web Fingerprinting with Chameleon - The Web Fingerprinting Series (Dispatch No. 1)
Conclusion
Chameleon Mode’s real‑browser approach already gives you a significant edge against detection, but no setup is perfect out of the box. By running BrowserScan’s suite of tests inside each profile, you turn guesswork into certainty. You’ll spot DNS leaks, WebRTC exposures, fingerprint inconsistencies, and IP blacklists before they cost you an account. Whether you manage a handful of high‑value profiles or 1,500 across a team, this combined workflow keeps every identity clean, trusted, and operation‑ready.
To see how BrowserScan stacks up against other fingerprinting tools, check out our in‑depth BrowserScan vs IPhey comparison. If you’re evaluating the overall privacy landscape, our BrowserScan vs BrowserLeaks vs Pixelscan guide can help you pick the right diagnostic tool for your stack.
FAQ
Do I need a separate VPN if I’m already using a proxy in Chameleon Mode?
A dedicated VPN can add an extra layer of encryption, but a well‑configured proxy that handles DNS and does not leak is usually sufficient. BrowserScan’s DNS and IP leak tests will tell you if a VPN becomes necessary.
Can BrowserScan detect that I’m using Chameleon Mode?
BrowserScan doesn’t look for anti‑detect software; it analyzes the fingerprint and network behavior your browser presents. Because Chameleon Mode uses a real stock browser, the fingerprint looks ordinary. A low authenticity score might hint at tampering, but a properly set up profile will score high.
What authenticity score is considered safe?
Generally, anything above 90% indicates a fingerprint that is not obviously spoofed. Scores in the upper 90s are what you’d see on a typical consumer device. Scores below 70% may indicate detectable randomization or a patched browser.
How often should I re‑test my profiles?
Test after initial creation, after any proxy change, and periodically (e.g., weekly) if you’re running long‑term campaigns. IP blacklist status can change, and occasional browser updates might shift fingerprint attributes slightly.
Does Chameleon Mode’s free trial include all features needed for this test?
Yes. The 7‑day free trial gives you full access to profile creation, proxy integration, and environment syncing. You can run BrowserScan inside trial profiles to evaluate the workflow before committing.
What if I see a blacklisted IP in the BrowserScan IP lookup?
Replace the proxy immediately. A blacklisted IP can trigger automatic bans on major platforms. Use BrowserScan’s multiple geolocation sources to confirm, but even a single DNSBL listing is cause for concern.