
Nmap Setup Guide: Install and Use the Free Security Scanner
Nmap Setup Guide: Install and Use the Free Security Scanner
Nmap, short for Network Mapper, is one of the most widely used free security tools for network discovery, port scanning, and security auditing. It helps administrators and security professionals identify hosts on a network, detect open ports, determine running services, and even fingerprint operating systems. This guide walks through installing Nmap on Windows, macOS, and Linux, then shows practical scan commands and how to interpret the output.
What Nmap Does
Nmap Setup Guide: Install and Use the Free Security Scanner - What Nmap Does.
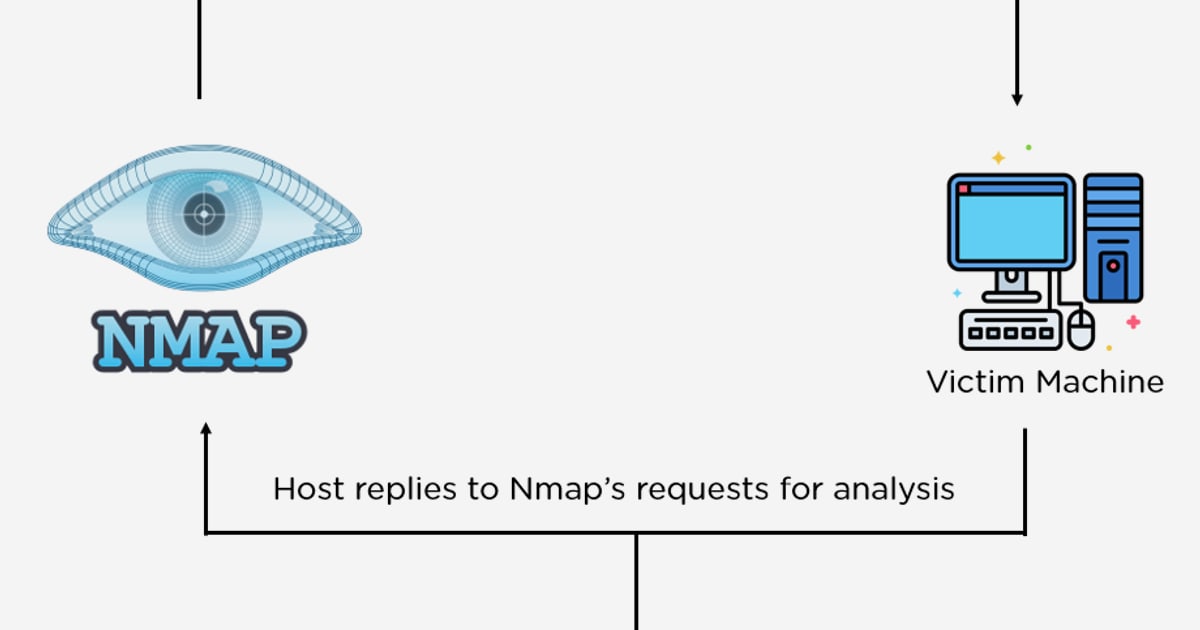
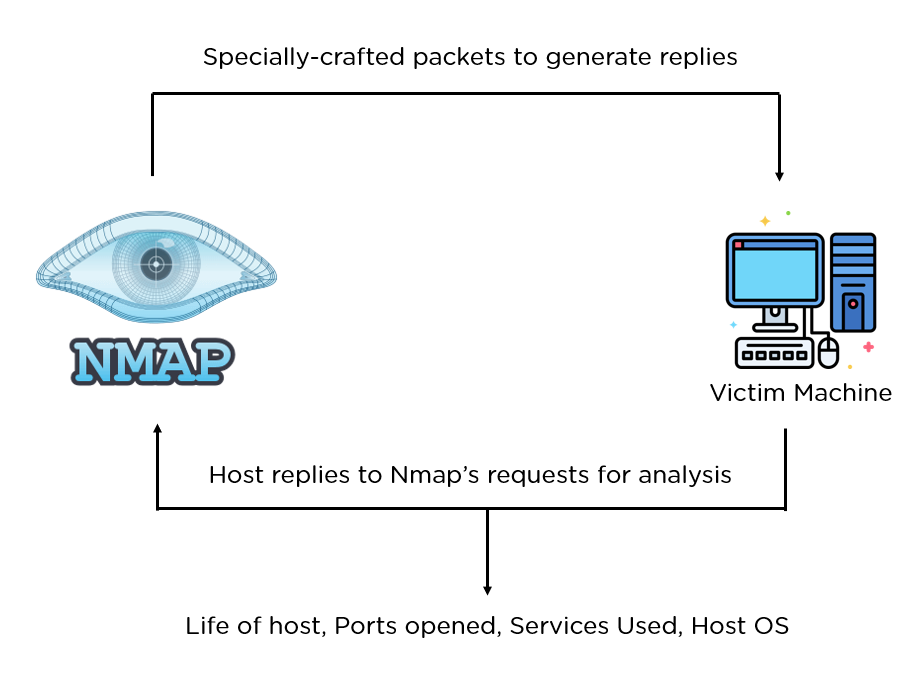
Nmap sends crafted IP packets to target hosts and analyzes the responses. From those responses, it can determine:
- Which hosts are reachable on a network
- Which ports are open, closed, or filtered
- What services and application versions are running
- Which operating system a host likely uses
- Whether packet filters or firewalls are in place
Because Nmap works at the packet level, it can scan everything from a single machine to large networks with hundreds of thousands of hosts. It runs on all major operating systems and is distributed as free, open source software.
Choosing Your Nmap Setup Method

Nmap Setup Guide: Install and Use the Free Security Scanner - Choosing Your Nmap Setup Method.
Your setup path depends on your operating system and how you plan to use Nmap. The table below summarizes the main options.
| Platform | Recommended Install | Alternative |
|---|---|---|
| Windows | Self-installer with Npcap | Compile from source |
| macOS | Disk image installer | Compile from source |
| Linux (RPM-based) | RPM packages | Compile from source |
| Linux (Debian-based) | Package manager | Compile from source |
Most users should choose the official binary installer for their platform. Compiling from source is useful for developers, contributors, or users who need the absolute latest code.
Installing Nmap on Windows
The Windows self-installer is the easiest way to get Nmap running. It bundles the Nmap executable, the Zenmap GUI, Ncat, Nping, and Ndiff, and it can install Npcap automatically.
Step 1: Download the Installer
Visit the official Nmap download page and download the latest stable Windows installer. The file name follows the pattern nmap-<version>-setup.exe.
Step 2: Run the Installer
Launch the installer and follow the prompts. During installation, you can choose which components to install. Most users should keep the defaults, which include:
- Nmap core files
- Npcap packet capture library
- Ncat, Nping, and Ndiff utilities
- Zenmap graphical interface
- Performance-related registry modifications
Npcap is essential for raw packet scanning on Windows. Without it, Nmap cannot perform SYN scans or OS detection. The installer also offers registry tweaks that improve connect scan performance by increasing the number of ephemeral ports and reducing connection reuse delays.
Step 3: Verify the Installation
Open a Command Prompt or PowerShell window and run:
nmap --version
If the command returns version information, Nmap is installed correctly. If Windows cannot find the command, the installation directory was not added to your PATH. You can either re-run the installer with the PATH option enabled or add the Nmap directory manually.
Windows Limitations to Know
Nmap on Windows has a few platform-specific constraints. Raw packet scans require an Ethernet interface, which includes most Wi-Fi adapters and many VPN clients. RAS connections such as PPP dial-up and certain VPN clients may not support raw scans. Without Npcap, scanning your own machine via loopback addresses like 127.0.0.1 generally fails. If you encounter these situations, use a TCP connect scan with -sT -Pn.
Installing Nmap on macOS
Nmap Setup Guide: Install and Use the Free Security Scanner - Installing Nmap on macOS.
Step 1: Download the Disk Image
Get the latest macOS installer from the Nmap download page. The file is distributed as a .dmg disk image containing an installer for Nmap, Zenmap, Ncat, and Ndiff.
Step 2: Run the Installer
Open the disk image and launch the installer package. Follow the on-screen instructions. The installer places the Nmap binaries in /usr/local/bin.
Step 3: Verify the Installation
Open Terminal and run:
nmap --version
If the command is not found, ensure /usr/local/bin is in your shell PATH. You can add it by editing your shell profile file.
Alternative: Homebrew
macOS users who prefer package managers can install Nmap with Homebrew:
brew install nmap
This method handles dependencies automatically and keeps Nmap updated through the standard Homebrew update process.
Installing Nmap on Linux
Linux installation varies by distribution. RPM-based systems such as Red Hat, Fedora, CentOS, and SUSE can use the official RPM packages. Debian-based systems such as Ubuntu and Debian can use their native package managers.
RPM-Based Distributions
Download the latest RPM packages from the Nmap download page and install them with:
rpm -vhU https://nmap.org/dist/nmap-7.991-1.x86_64.rpm
rpm -vhU https://nmap.org/dist/ncat-7.991-1.x86_64.rpm
rpm -vhU https://nmap.org/dist/nping-7.991-1.x86_64.rpm
Replace the version numbers with the current release if they have changed.
Debian-Based Distributions
On Ubuntu, Debian, and their derivatives, use APT:
sudo apt update
sudo apt install nmap
Most major distributions also include Nmap in their default repositories, so dnf install nmap or pacman -S nmap works on Fedora and Arch Linux respectively.
Compiling from Source
If you need the latest code or want to contribute to development, download the source tarball from the official site and run:
bzip2 -cd nmap-7.991.tar.bz2 | tar xvf -
cd nmap-7.991
./configure
make
sudo make install
Compilation requires standard build tools such as GCC and Make. The source tarball includes Zenmap and all auxiliary tools.
Running Your First Nmap Scan
Once Nmap is installed, start with basic scans to verify everything works. Always ensure you have permission to scan the target network or host.
Basic Host Scan
Scan a single host with default options:
nmap 192.168.1.1
This performs a TCP SYN scan of the 1,000 most common ports and reports which are open.
Service and Version Detection
Add version detection to identify running services:
nmap -sV 192.168.1.1
Aggressive Scan
For a comprehensive scan that includes OS detection, version detection, script scanning, and traceroute:
nmap -A 192.168.1.1
The -A flag is a convenient shortcut, but it generates more traffic and takes longer. Use it selectively.
Scanning a Network Range
Scan an entire subnet using CIDR notation:
nmap 192.168.1.0/24
This discovers all reachable hosts in the range and reports their open ports.
Scanning Specific Ports
Target specific ports or port ranges:
nmap -p 22,80,443 192.168.1.1
nmap -p 1-1024 192.168.1.1
Interpreting Nmap Results
Nmap reports each scanned port in one of several states:
- Open: A service is actively accepting connections on this port.
- Closed: The port is reachable, but no service is listening.
- Filtered: A firewall or packet filter is blocking the probe, so Nmap cannot determine the state.
- Unfiltered: The port is reachable, but Nmap cannot determine whether it is open or closed.
- Open|Filtered: Nmap cannot distinguish between open and filtered, common with UDP scans.
A sample output might look like:
PORT     STATE SERVICE
22/tcp   open  ssh
80/tcp   open  http
443/tcp  open  https
This tells you SSH, HTTP, and HTTPS services are running. Version detection adds details such as the SSH implementation and version number.
Using Zenmap for Graphical Scans
Zenmap is the official graphical frontend for Nmap. It provides a visual interface for building scan commands, viewing results, and comparing scans over time. Zenmap is included with the Windows and macOS installers and can be installed separately on Linux.
To use Zenmap:
- Launch Zenmap from your application menu.
- Enter a target IP address or hostname in the Target field.
- Select a scan profile from the dropdown, such as "Quick scan" or "Intense scan."
- Click Scan and review the results in the Nmap Output, Ports/Hosts, Topology, and Host Details tabs.
Zenmap is especially useful for users who prefer a visual workflow or need to document scan results with saved profiles.
Verifying Your Own Network Security
After setting up Nmap, you can use it to audit your own network and devices. A common workflow is to scan your router, local servers, or public-facing services to identify unexpected open ports. If you find services you did not intend to expose, close them at the firewall or disable the underlying application.
For a browser-based alternative that requires no installation, BrowserScan offers an Nmap-powered port scanner that checks common ports from your browser. It is useful for quick checks when you want to test reachable services without setting up a command-line environment. BrowserScan also provides complementary privacy tests such as DNS and WebRTC leak checks, which help verify that a VPN is not exposing your real IP address. If you are building a broader privacy workflow, consult the privacy guides for threat modeling and tool selection.
Common Nmap Setup Problems and Fixes
Nmap Command Not Found
On Windows, this usually means the installation directory was not added to PATH. Re-run the installer and ensure the PATH option is selected. On macOS or Linux, verify the binary location and add it to your shell PATH.
Raw Packet Scans Fail on Windows
This typically indicates Npcap is missing or not functioning. Reinstall Npcap from the official site and ensure the Npcap service is running. If raw scans still fail, use -sT -Pn for a TCP connect scan.
Scans Are Slow
Slow scans can result from network latency, firewalls dropping packets, or scanning large port ranges. Use timing templates such as -T4 for faster scanning, or reduce the port range. On Windows, ensure the performance registry modifications were applied during installation.
Permission Denied Errors on Linux
Raw packet scans require root privileges. Run Nmap with sudo or use a TCP connect scan with -sT if you cannot elevate privileges.
Related reading
- Account Burn Rate Reduction: Tactics to Extend Runway - Learn how to calculate gross and net burn rate, extend cash runway, and reduce account burn with practical cost, revenue, and payment strategies.
- Virtual Browser Profiles: How They Work and When to Use Them - Learn what virtual browser profiles are, how they isolate browsing data, and when to use them for privacy, testing, and multi-account management.
- Pixelscan Setup: How to Test and Harden Your Browser - Learn how to set up Pixelscan for browser fingerprint, proxy, DNS, and WebRTC testing. Step-by-step workflow, result interpretation, and hardening tips.
Sources and further reading
- Nmap: the Network Mapper - Free Security Scanner - Nmap Free Security Scanner, Port Scanner, & Network Exploration Tool. Download open source software for Linux, Windows, UNIX, FreeBSD, etc.
- Windows | Nmap Network Scanning - While Nmap was once a Unix-only tool, a Windows version was released in 2000 and has since become the second most popular Nmap platform (behind Linux). Because of this popularity and the fact that many Windows users do not have a compiler, binary executables are distributed for each major Nmap release. We support Nmap on Windows 7 and newer, as well as Windows Server 2008 and newer. We also maintain a guide for users who must run Nmap on earlier Windows releases. Nmap runs equally well on Windows as on Unix in nearly every way, though there are a couple of known limitations:
Frequently Asked Questions
Is Nmap really free?
Yes. Nmap is free and open source software distributed under a custom license derived from the GNU General Public License. You can download, use, modify, and redistribute it without cost.
Is Nmap legal to use?
Nmap itself is legal. However, scanning networks or hosts without permission may violate laws or acceptable use policies. Always obtain authorization before scanning systems you do not own or administer.
Do I need Npcap on Windows?
Npcap is required for raw packet scans, OS detection, and many advanced features on Windows. The self-installer includes Npcap and installs it automatically unless you opt out.
Can Nmap scan my own computer?
Yes, but on Windows you need Npcap installed to scan loopback addresses. On Linux and macOS, scanning localhost works with standard commands.
What is the difference between Nmap and Zenmap?
Nmap is the command-line scanning engine. Zenmap is a graphical user interface that wraps Nmap, providing visual scan profiles, topology maps, and saved result comparisons.
How do I update Nmap?
On Windows and macOS, download the latest installer from the official site and run it. On Linux, use your package manager's update command. Compiling from source users should download the newest tarball and rebuild.
Conclusion
Nmap remains the standard tool for network discovery and security scanning because it is powerful, portable, and free. Setting it up takes only a few minutes on Windows, macOS, or Linux, and the first scan can reveal immediately which services are exposed on your network. Start with basic host and port scans, learn to interpret the output, and gradually explore version detection, OS fingerprinting, and the Nmap Scripting Engine. For quick browser-based port checks and complementary privacy diagnostics, BrowserScan provides a practical no-installation option that fits into a broader security testing workflow.